Step 6: Finally, open the main.dart file and insert the following code
import 'package:flutter/material.dart';
import './FirstScreen.dart';
import './SecondScreen.dart';

void main() => runApp(MyApp());

class MyApp extends StatelessWidget {
  @override
  Widget build(BuildContext context) {
    return MaterialApp(
      home: DefaultTabController(
        length: 2,
        child: Scaffold(
          appBar: AppBar(
            title: Text('Flutter Tabs Demo'),
            bottom: TabBar(
              tabs: [
                Tab(icon: Icon(Icons.contacts), text: "Tab 1"),
                Tab(icon: Icon(Icons.camera_alt), text: "Tab 2")
              ],
            ),
          ),
          body: TabBarView(
            children: [
              FirstScreen(),
              SecondScreen(),
            ],
          ),
        ),
      ),
    );
  }
}
Output
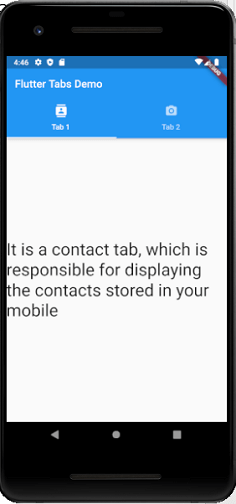
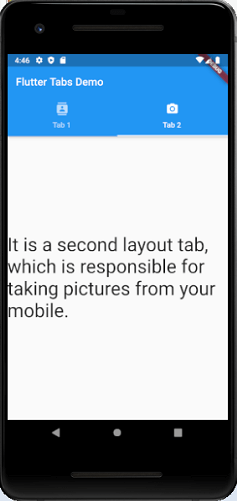
Now, run the app in your Android Studio. It will give the following screen where you can see two tab icons. So when you click any of the tab icons, it will display the associated screen.
Leave a Reply